
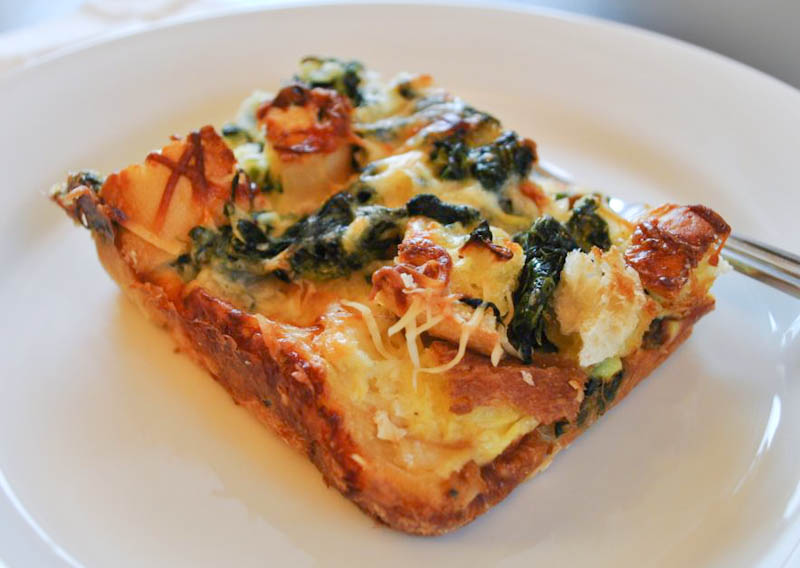
Christmas breakfast is that glorious thing sandwiched between ripping presents open like a crazed banshee and playing with all of your new toys. It’s best enjoyed with coffee and boozy beverages (mimosas and bloody marys, perhaps). And it’s even better when you just have to pop it in the oven as soon as you pad downstairs in your Christmas slipper socks, still bleary eyed with an epic case of bed head.
Enter the strata. It’s basically savory bread pudding and tastes like a quiche and a frittata made sweet love and popped out a delicious cheesy, crusty, eggy baby. Prep everything the night before and bake it the next morning. Easy as pie. Or strata.
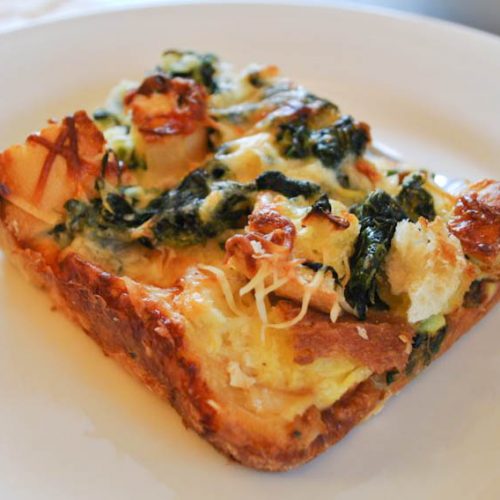
Spinach & Cheese Strata
Ingredients
- 1 loaf ciabatta, cubed
- 1 (10 oz.) package frozen chopped spinach, thawed
- 1 large yellow onion, diced
- 2 tbsp butter
- 1 tsp salt
- 1/2 tsp freshly ground black pepper
- 1 cup gruyere, grated
- 1 cup extra sharp white cheddar, grated
- 8 large eggs
- 2 1/2 cups low-fat milk
- 1 dash ground nutmeg
Instructions
- Preheat oven to 250 degrees.
- Cube ciabatta and spread in one layer on a baking sheet. Bake for 20 minutes until lightly toasted and dried out. Set out until cooled to room temperature.
- Thaw spinach in microwave and remove all excess liquid. (My handy method is to wrap it in one million paper towels and wring it out.)
- Melt 1 tbsp butter in a large skillet over medium heat. Add onion and sauté until soft, about 5 minutes. Add 1/2 teaspoon salt, 1/4 teaspoon pepper and continue cooking for one minute. Stir in spinach, remove from heat and set aside.
- Grease baking dish with remaining tablespoon of butter. Spread half of the bread cubes in the dish and top with half of spinach mixture and half of cheese. Repeat layering with remaining bread, spinach and cheese. Whisk eggs, milk, nutmeg, and remaining 1/2 teaspoon salt and 1/4 teaspoon pepper together in a large bowl and pour evenly over the strata.
- Cover strata with plastic wrap and refrigerate overnight.
- The next day, let it stand at room temperature for 30 minutes while preheating the oven to 350°F. Bake uncovered in the middle of the oven until golden brown and cooked through, 50 minutes. To get it extra crispy on top, broil for 1-2 minutes. Let stand 5 minutes before serving.
- Eat, sip your mimosa and help yourself to seconds.